Generating Content with the AI Process Designer
AI Process Designer is currently in beta. Contact Procedureflow to opt-in. Please share your feedback using the in-app feedback form.
Procedureflow's AI Process Designer assists you in generating simple flows with just a few text inputs. Think of AI Process Designer as a workbench: you can experiment with text inputs without making any commitments. Try generating a flow multiple times until you have something of value.
You can generate content to add to an existing flow, or generate an entirely new flow.
The AI Process Designer offers two generation modes:
- Creative Mode – best for generating content from scratch or for processes that are not already well-defined. The AI Process Designer may take more liberty to be creative: removing steps it deems redundant, summarizing content, filling in gaps, etc.
- Strict Mode – best for converting existing, well-defined processes, such as SOPs, to visual flows. The AI Process Designer will take less creative freedom, splitting the input text into steps verbatim.
Procedureflow AI Process Designer leverages OpenAI’s Enterprise APIs to interpret user intent and assist in generation of suggested flow. Input data is processed securely and transiently; no customer data is stored or used by OpenAI for model training. Please see our Security and Trust page to learn more.
Best practices
- Important: All AI-generated process flows should be carefully reviewed and validated by a human before publication.
- Important: AI Process Designer will only design one flow at a time, so separate processes into distinct requests.
- The generation mode you select - Creative or Strict - should depend on your input and use case.
For guidance on selecting the best generation mode for your use case, please refer to this article on AI Process Designer Generation Modes.
-
The more specific you are, the better your results will generally be. For example, the instructions to generate new content using Creative Mode—“Mobile phone billing procedure for call centre agents”—could be improved by being more specific:
“Mobile phone billing procedure having steps for the customer service agent to follow. Deals with customers from Ohio only, can escalate to fraud, management, etc. First steps are to verify the customer’s account and identity.”
- When importing content from longer documents, it’s best to copy procedures one at a time.
- When pasting text from any text-based documents like HTML, PDF or Word:
- Formatting the text in the AI Process Designer textbox can give you better results; remove extraneous text when copy and pasting, and use numbered steps instead of bullets.
- When pasting text from tables, be careful to copy & paste each row or column one at a time. Otherwise the ordering of the content will not be accurate and you may not get the best results.
- Images do not get copied over. However, you may copy & paste images in the flow editor canvas as you normally would.
- Input text is not saved once you add the new flow to the entry point (or new content to an existing flow). If you want to keep a record of the text inputs that you used to create content, either do a screen capture or copy your inputs to a notepad app.
Generating content
-
Open or create a change request.
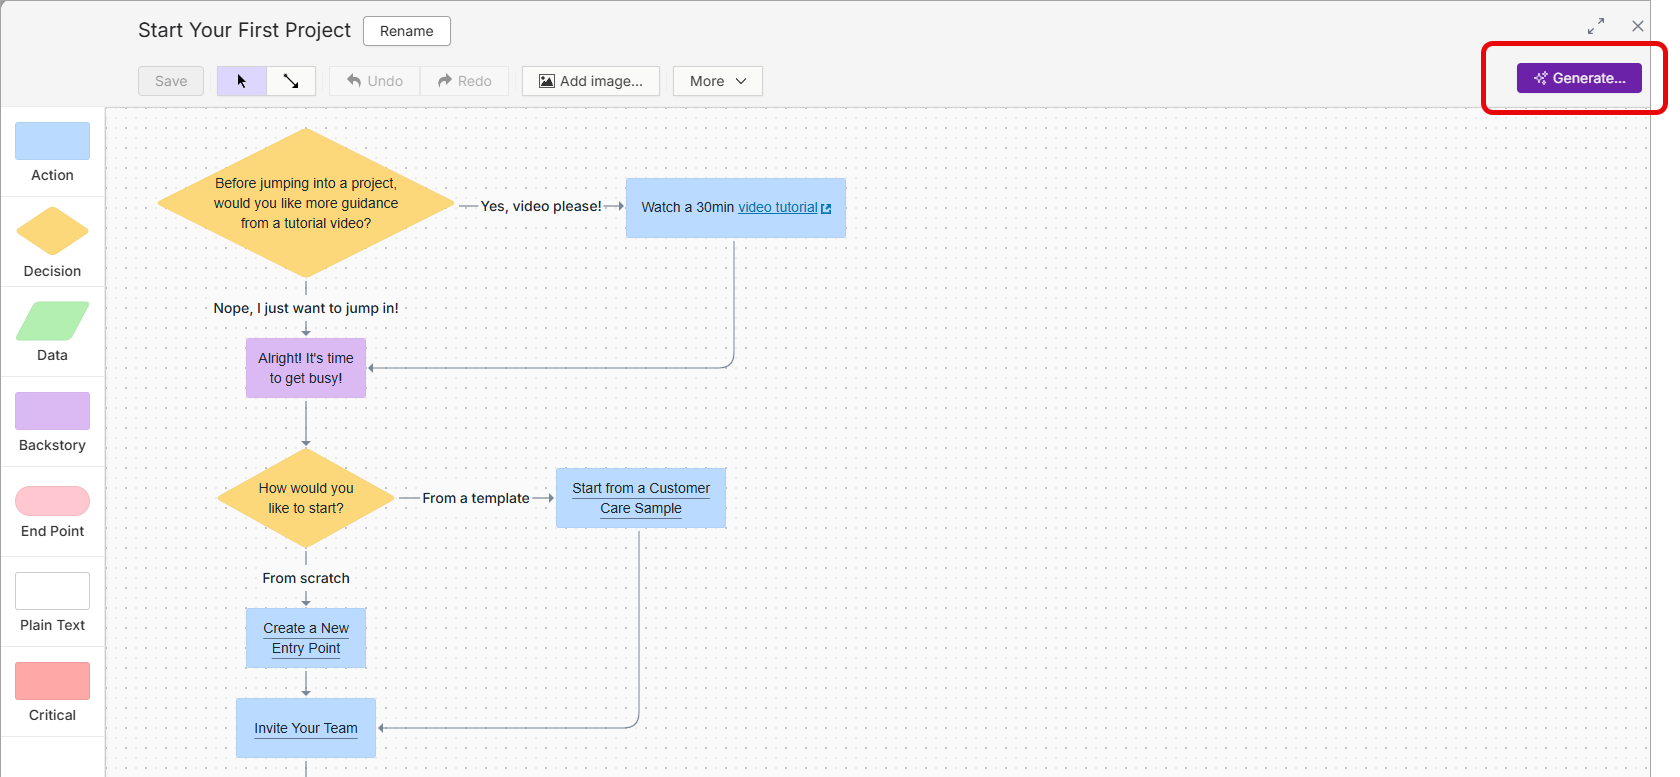
To generate content to add to an existing flow, open that flow in edit mode and click Generate.
or
To generate a new flow:
- Optionally, navigate to the flow from which you want to link the new flow.
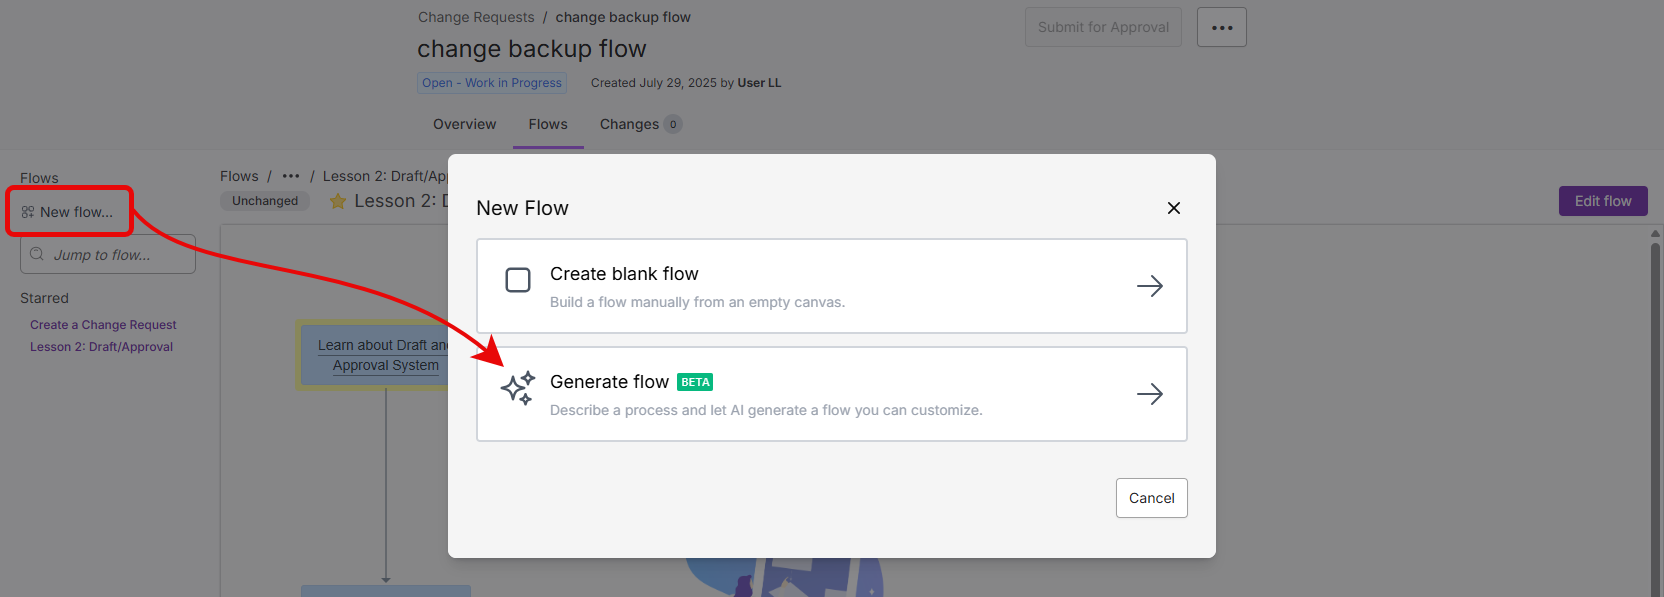
- On the Flows tab, click New flow in the left navigation bar.
-
Click Generate flow.
- Enter your text inputs to describe the process flow. These should include a title and numbered steps (see Best Practices above).
-
Select Creative Mode or Strict Mode, then click Generate flow.
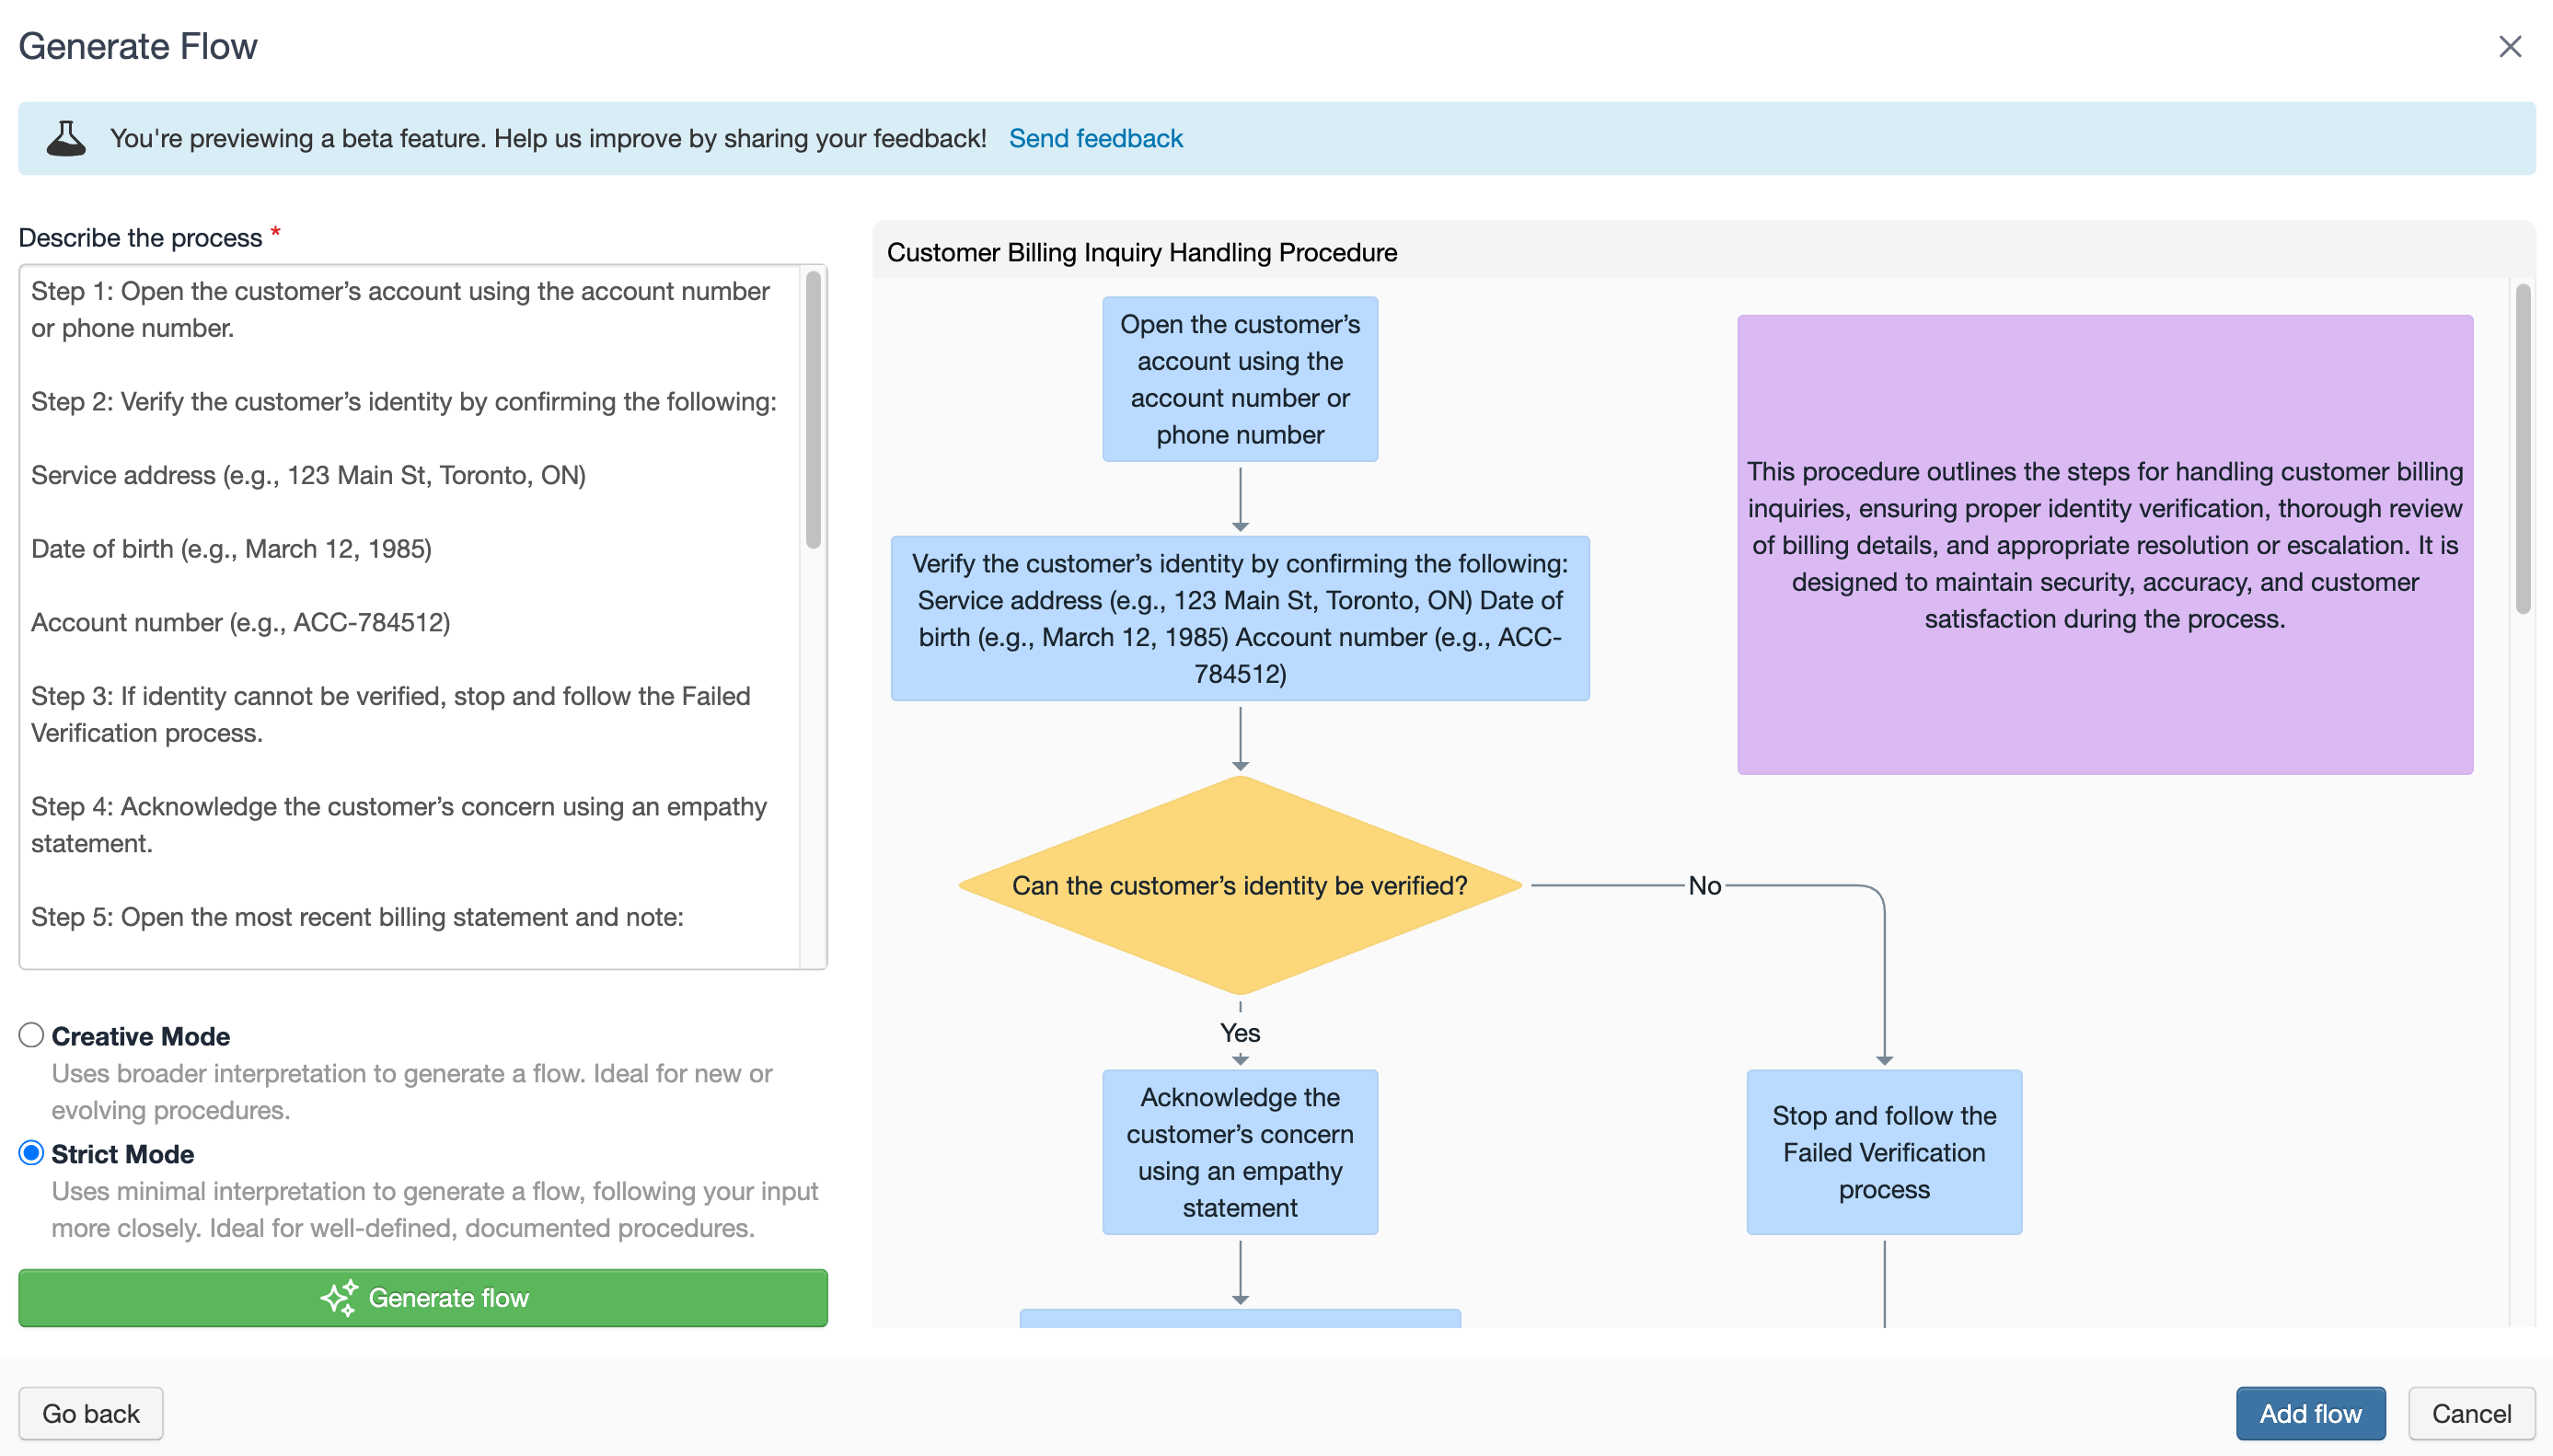
- If the results are not quite what you envisioned, adjust your inputs and click Generate flow again. Repeat until you are happy with the results. Keep in mind that you will likely need to manually tweak the content after it is created, so don’t get hung up on perfection.
- When you are satisfied with the results, click Add [to] flow.
-
If you generated content from an existing flow, the new content is added directly to the canvas.
If you generated a new flow, it will automatically be linked to the flow from which you initiated the generative process. For example, if you started from the entry point's default flow, when you click Add flow an action shape will be added to this flow. The action shape will be linked to the new flow that you just created.
Note The name of the flow is also generated; take note of the generated name (shown at the top of the flow) so it's easier to find.


Accédez à cet article en français