
Embedding Procedureflow in Genesys Cloud
This guide provides detailed steps on how to configure a Genesys Cloud Interaction widget with Procedureflow. This can be set up to work with different channels. An inbound request accepted by an agent with access to the interaction widget gives the agent access to the configured widget.
1. Prerequisites
Complete the following before configuring the interaction widget:
1.1 Groups
Ensure the agent that needs access to the interaction widget is part of a group.


- In the Genesys Cloud dashboard, navigate to User Management → Groups.
- Create a new group by clicking
Add General Groupor use an existing group. - Add a new member by clicking
Editin the top right.- At the bottom of the page, within the input field with the placeholder
Add Individualsearch the agent's name. - Select the name from the results and click
Save
- At the bottom of the page, within the input field with the placeholder
1.2 Create embed URL
Before creating the Genesys script, get the Procedureflow embed URL for the experience you want to enable:
- Entry Point: Use an Entry Point embed URL to give users access to Procedureflow content through the canvas. See Create an embed link for an Entry Point.
- AI Chat: Use a Chat embed URL to give users access to Procedureflow content through a conversational interface. See Create an embed link for AI Chat. Keep the embed URL available. You'll use it when configuring the Genesys script.
-
Note: AI Chat are currently in Beta. Features and behavior may change as the Beta evolves.
-
2. Interaction Widget
Note: Ensure the necessary licenses required to gain access to the interaction widget are enabled.
Add Integration
- Navigate to IT and Integrations → Integrations
-
Select
Add Integration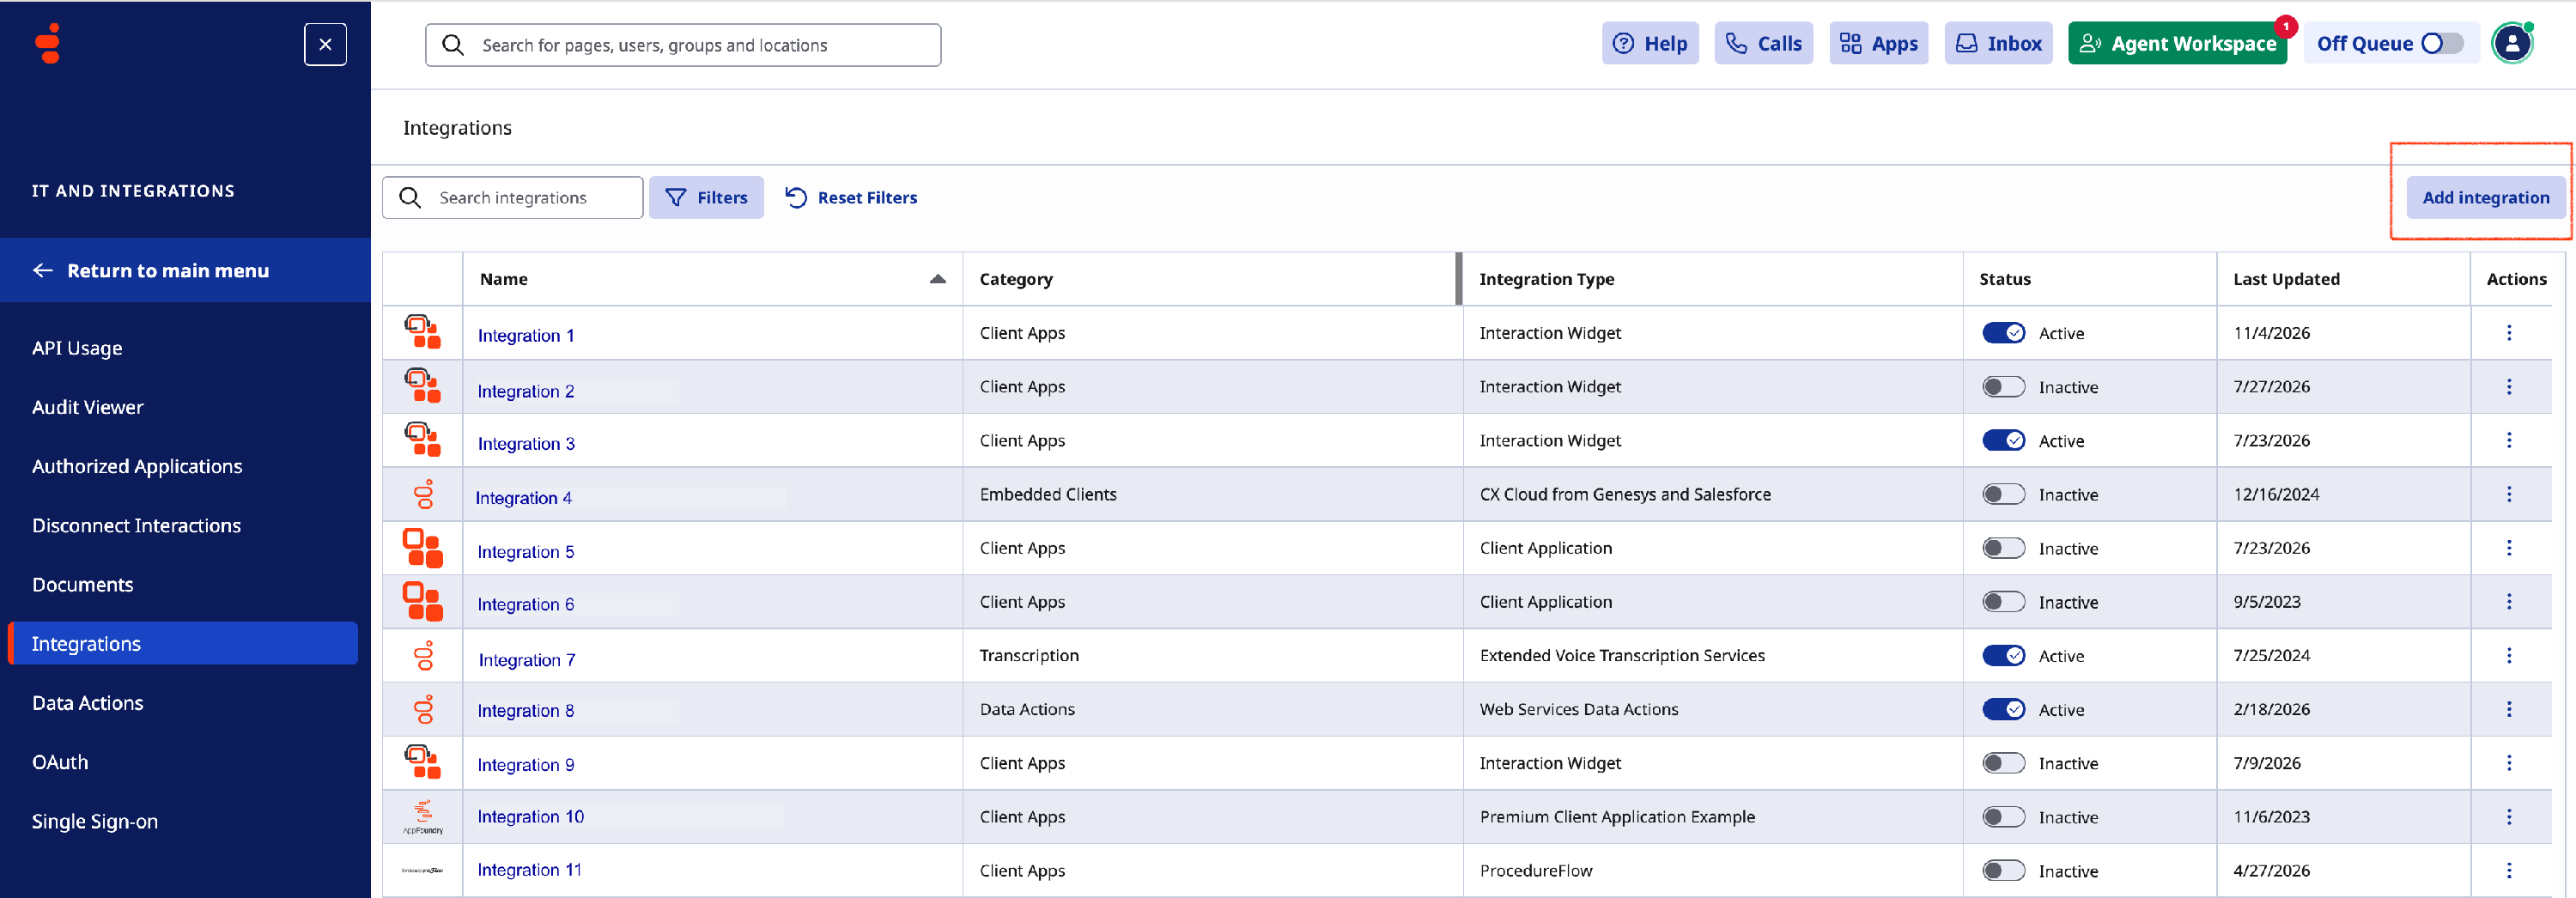
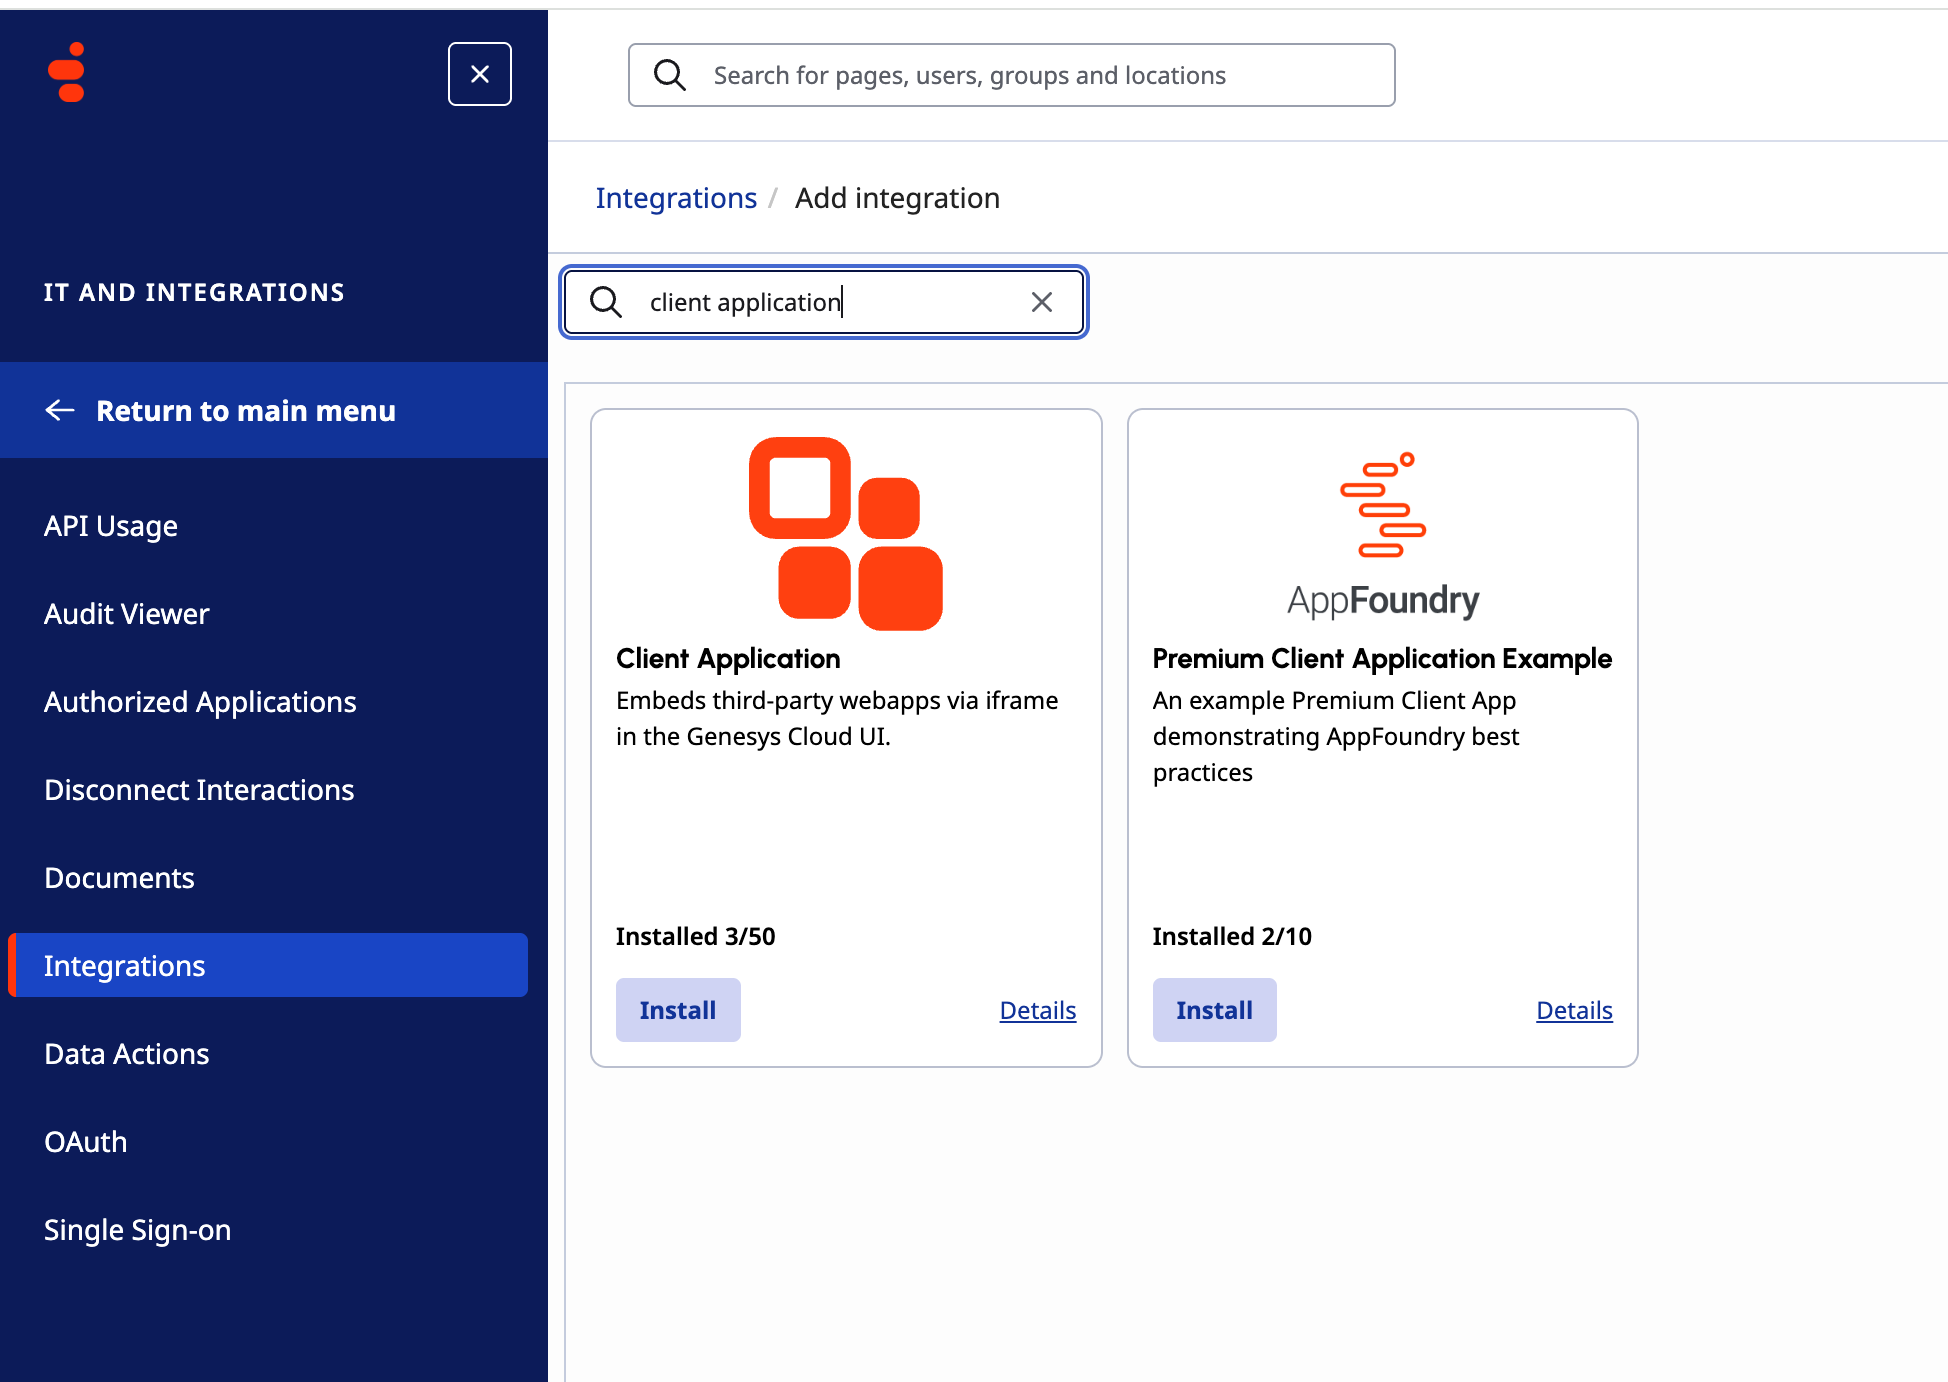
- Search
the client applicationin the search bar. - Click
Installon theClient Applicationresult.
Configure Integration
- Under the
Detailstab, input theIntegration Nameand optional notes in theNotessection. -
Click the
Configurationtab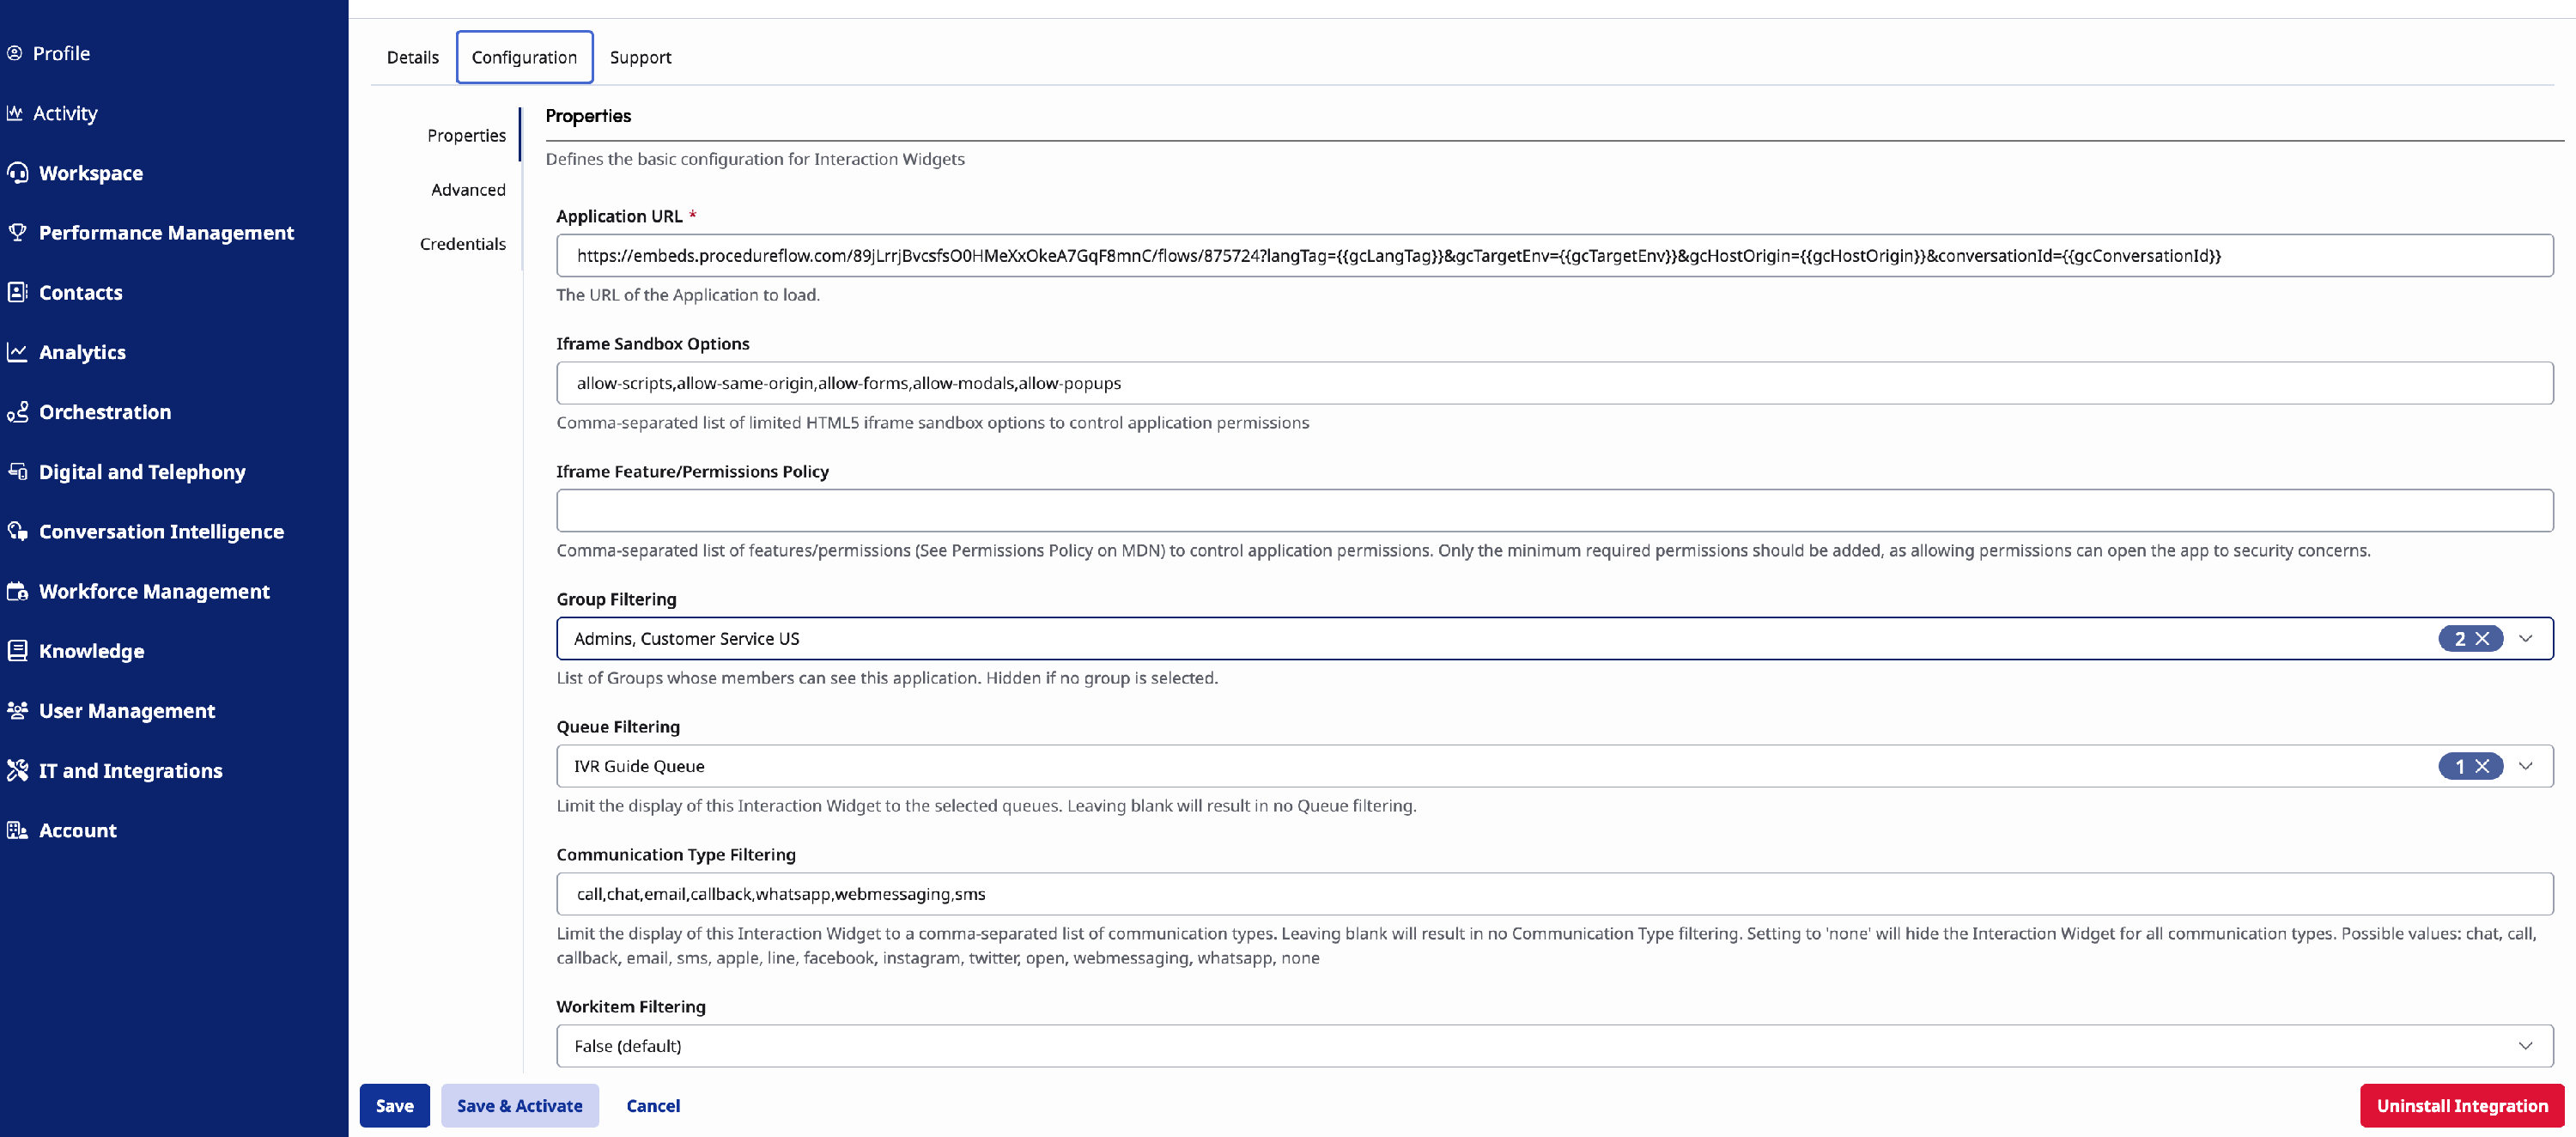
- Under the
Propertiessub-section, input the following details:- Application URL:
- Copy the embed URL created in section [[#1.2 Create embed URL]]
- Entry Point embed: Append
/flows/<flowId>to the URL.flowIdshould be the ID of the first flow in the entry point.
- Chat embed: Append
/chatto the URL - Append the following query params to the end of either URL:
langTag={{gcLangTag}}&gcTargetEnv={{gcTargetEnv}}&gcHostOrigin={{gcHostOrigin}}&conversationId={{gcConversationId}} - Genesys populates the variables automatically when your widget runs.
- The final URL should look like the following:
https://embeds.procedureflow.com/<hash>/chat?langTag=&gc TargetEnv={{gcTargetEnv}}&gcHostOrigin={{gcHostOrigin}}&conversationId={{gcConversationId}}for chat embed andhttps://embeds.procedureflow.com/flows/<hash>/<flowId>? langTag=&gc TargetEnv={{gcTargetEnv}}&gcHostOrigin={{gcHostOrigin}}&conversationId={{gcConversationId}}for entry point embed.
- Iframe Sandbox Options:
- Input the following string:
allow-scripts, allow-same-origin, allow-forms, allow-modals, allow-popups
- Input the following string:
- Group Filtering:
- Select the group the agent belongs to as set up in [[#1.1 Groups]].
- This is key because without this selection the agent has no access to the interaction widget
- Queue Filtering:
- If the interaction widget needs to be restricted to specific groups, select all groups you want it to be enabled.
- Ensure the agent is also part of at least one of the selected groups.
- Communication Type Filtering:
- Input the following string to enable interaction widgets in the specified channels:
call, chat, email, callback, whatsapp, web messaging, sms
- Input the following string to enable interaction widgets in the specified channels:
- Work item Filtering:
- Set the value at your discretion.
- Application URL:
- Under the
Advancedsub-section, paste the following snippet if you want to prevent a reload of the interaction widget when the agent switches between multiple interaction views, e.g., voice and chat. Otherwise, skip this section
{
“lifecycle”: {
“ephemeral”: false,
“hooks”: {
“blur”: true,
“bootstrap”: false,
“focus”: true,
“stop”: true
}
}
}
- Click
Save & Activateat the bottom of the page to save changes and activate the interaction widget.
3. Verify Agent Access
Note: Trigger a session reset for the agent by getting them to log out of their Genesys cloud dashboard and then logging back in.
- Set up a voice or chat interaction that the agent accepts.
- Once the agent accepts the interaction, the widget should appear at the top of the agent's workspace.
- On first use, the widget might be inactive and might not appear on the agent's workspace.
- The agent will need to click on it to activate. A blue background on the widget signifies activation.
- The agent should be able to see an embedded version of Procedureflow on the screen.
Workspace with inactive widget

Workspace with active widget

